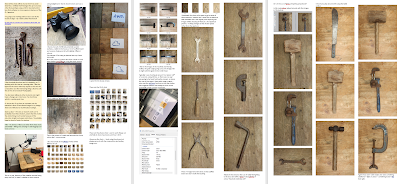
This is the other type of design sheet often referred to as your Main design sheet.
This is the one where you record all your activities relating to your own personal photographs relating to the task you're set.
The layout of this design sheet should be...
- The title of it should have your name at the front e.g. Dave Thompson - Pinhole project
- There should be a front page with the title and your name
- The main Initial research should be the first 6 pages or so.
- Each artist should be researched in terms of their operational context, typical clients, how and where their work is seen and used, how their work is presented, who their audience is with demographic details. You should aim to use images of their work in situ, example of their work being sold on websites and lists of clients and exhibitions. In essence as much info that shows how they make a living through their photography.
- A good selection of their images associated with the research you're doing into the artists.
- Then an example of a relevant 'Key image' that you've analysed and deconstructed using the prompts found on the blog via the sidebar to the right.
4. The you have to write a Post research reflection, in this you need to explain why the research was useful to you, how it's inspired and given you ideas and what the key take-aways are from the research that will inform your work. You then need to explain what type of work you're aiming to produce in terms your own operational context will it be editorial in nature, art photography, stock photography etc. Who might use it in terms of potential clients and where and how might your images be seen? Who is your target audience and why.
5. The Plan Then you need a detailed plan with details of who, when, where, why, how, using what, experimenting and trying what and why? Pre-empting any potential problems that might encounter, contingency planning and when the work will be uploaded to your design sheet. (See blog posts on planning).
6. The pictures "Execute" e.g. the doing part - your images. This usually features contact sheets showing the majority of the images you've shot - usually a cross section of about 50-75 thumbnails that show what you've done during the shoot. Then a selection of images as below showing the best of your images - one to three pages. If you do any post production work (photoshop or darkroom work) record what you do if it's new learning - screen grabs and test sheets or preliminary darkroom prints showing the learning and experimental processes.
7. Reflection Then using the prompts from the 'Reflection' guidance posts write a detailed reflection - reflecting on what you've learned what you could have done better, what value was there in terms of your progression goals (See blog on progression goals) and skills acquisition. Then critically appraise your work in terms of whether at this stage it is fit for purpose - does it look good enough to use in the operational context you identified at stage 4 above? For instance if you've said your work is designed to be 'Art Photography' is honestly at a stage at this point where you can image it being sold, or seen in a gallery? If not why not, what more do you need to do?
Then repeat the process 5,6 and 7 again and again experimenting and developing the work further trying to get it to the standard where it could be deemed as good standard work.


No comments:
Post a Comment